
ACGGOODS Virtual Booth: Setup Guides
Welcome to the ACGGOODS Booth Setup Guide! We’re excited to have you join us as a virtual booth seller. This guide will walk you through every step of the process. You’ll learn how to apply as a virtual booth seller, set up your booth, and get ready for the event.
Step1: Become a virtual booth seller
To help create a great experience for everyone, all booth applications are reviewed before approval. Before applying for a booth, please make sure you meet both the following conditions:
You have an active seller account.
Your store has at least 10 published product.
Ready to become an exhibitor? Applying only takes a few minutes.
1. Locate the Application: Log in to your ACGGOODS account, click on “Your Store”, and select Virtual Booth.
2. Submit the Form: Fill out and submit your initial application.
3. Staff Review: Our team will review your application within 1-2 business days.
Once your application is fully approved, you will get an invitation code and be able to access and manage your virtual booth by navigating to Store Dashboard > Virtual Booth > Add Booth
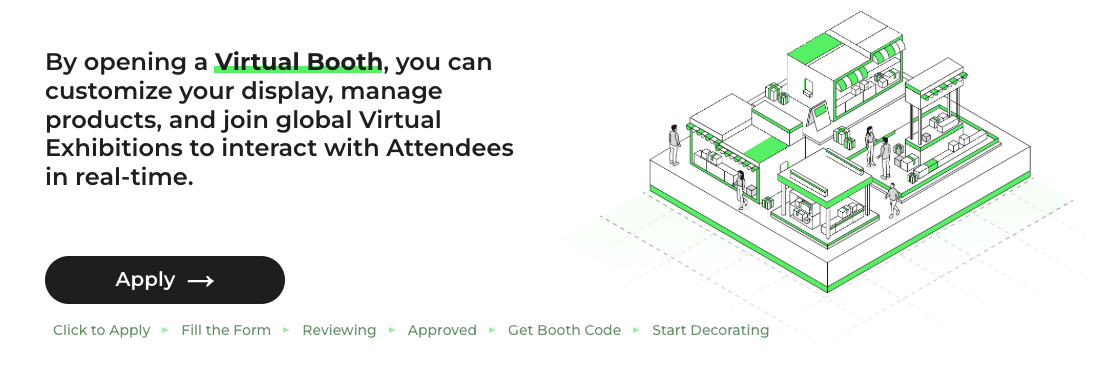
Step2: Set Up Your Booth
Your booth is your storefront during the virtual convention. A complete and attractive booth helps visitors discover your work more easily.
1. Create and Access Your Booth
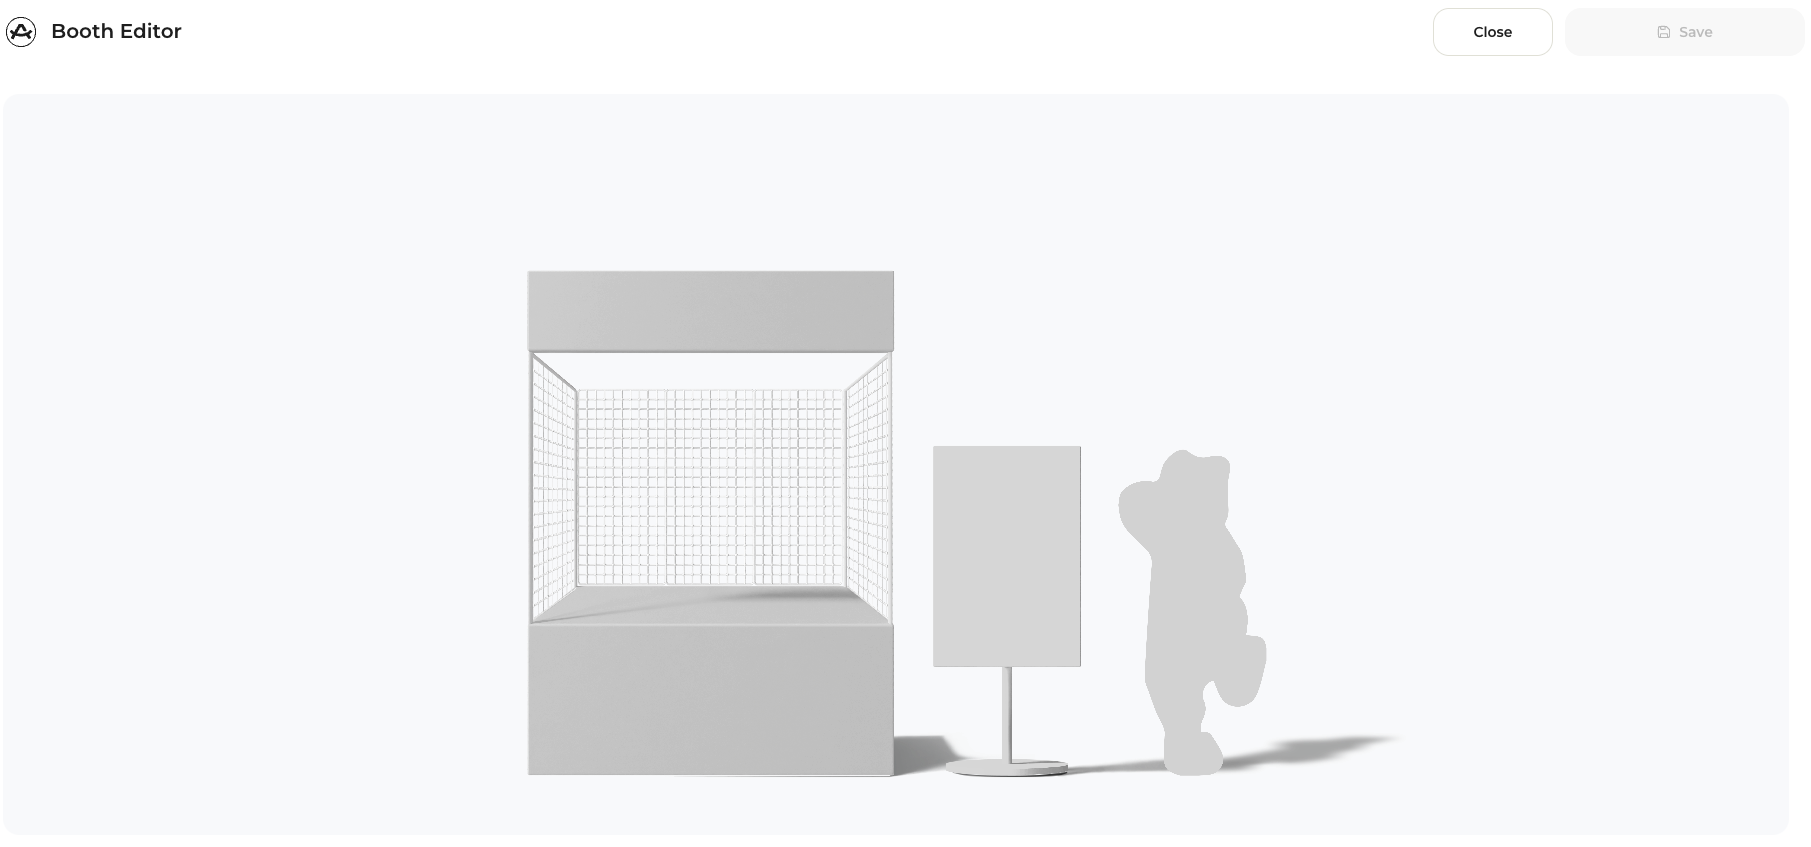
Click “Add Booth” to create a new virtual booth. Standard users can create up to 3 booths. (Note: Users with the “Virtual Exhibitor” role in our Discord can create unlimited booths as a thank-you for supporting us during the interest survey!)
Next, click “Edit Booth” to open the editor tool. The editor is divided into three main sections: The Booth, The Profile, The Avatar.
2. Customize Your Booth
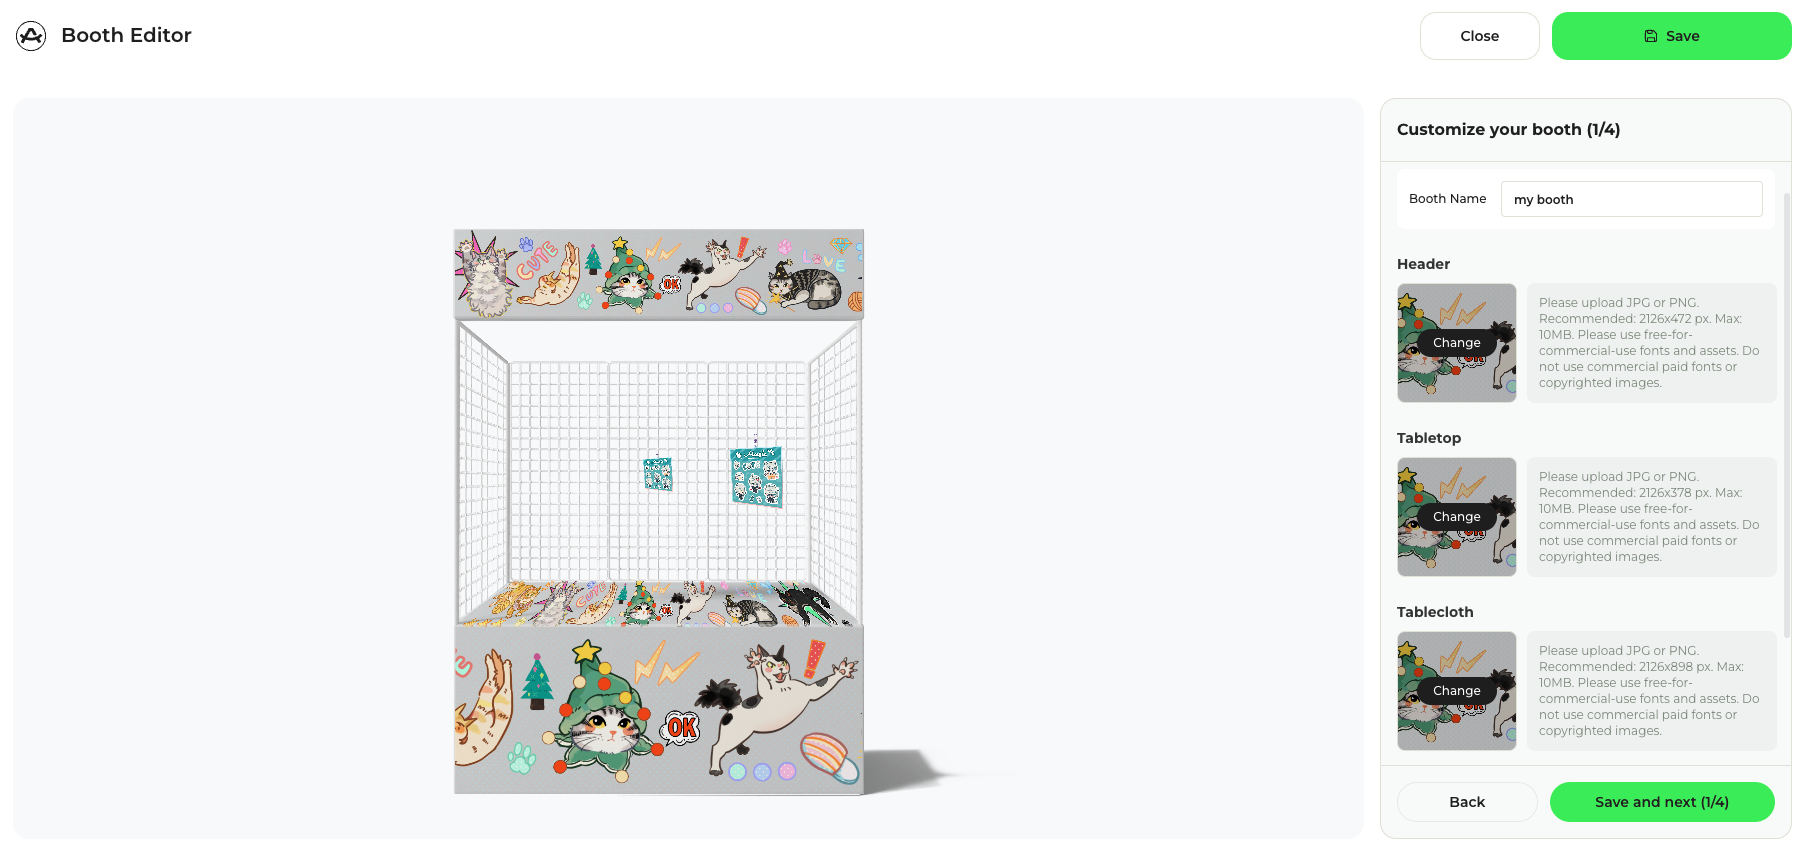
In this section, you can build the physical look of your booth step-by-step:
Base Elements: Click on the booth to upload your header banner, tabletop, and tablecloth. Please ensure all uploaded images meet the exact sizing requirements. Save your progress and proceed to the next step.
Product Racks: You have up to 5 display racks to decorate, which you can toggle on or off. For each active rack, you can change the background color or upload a custom background design (optional). Next, add your products to the rack and freely resize the mockups to your liking. Please remember to click save after finishing each rack!
Tabletop Display: You can place standees on your table or simply leave it blank.
Decorations: Finally, add some flair! We provide pre-made stickers (like banners) for you to use, but you can also upload your own custom designs to decorate your space.
3. Customize Your Display Profile
The second section is the Display Profile. Here, you can upload a profile design to introduce yourself! Use this space to share your social media links, tell visitors who you are, and let them know what your shop is all about.
4. Customize Your Avatar
Your avatar represents you. When visitors walk up to your virtual booth, they will see this avatar standing directly behind it. We highly recommend uploading a full-body character design so it looks natural standing behind the counter!
Step3: Join a Virtual Convention
Once your Virtual Booth is fully set up, you can use an Exhibitor Code to enter a Virtual Convention.
How to get an Exhibitor Code:
1. Browse the Virtual Convention Channel in our Discord server and find the event you want to join.
2. Contact the event organizer to submit your application.
3. Once approved, the organizer will provide you with your unique Exhibitor Code.
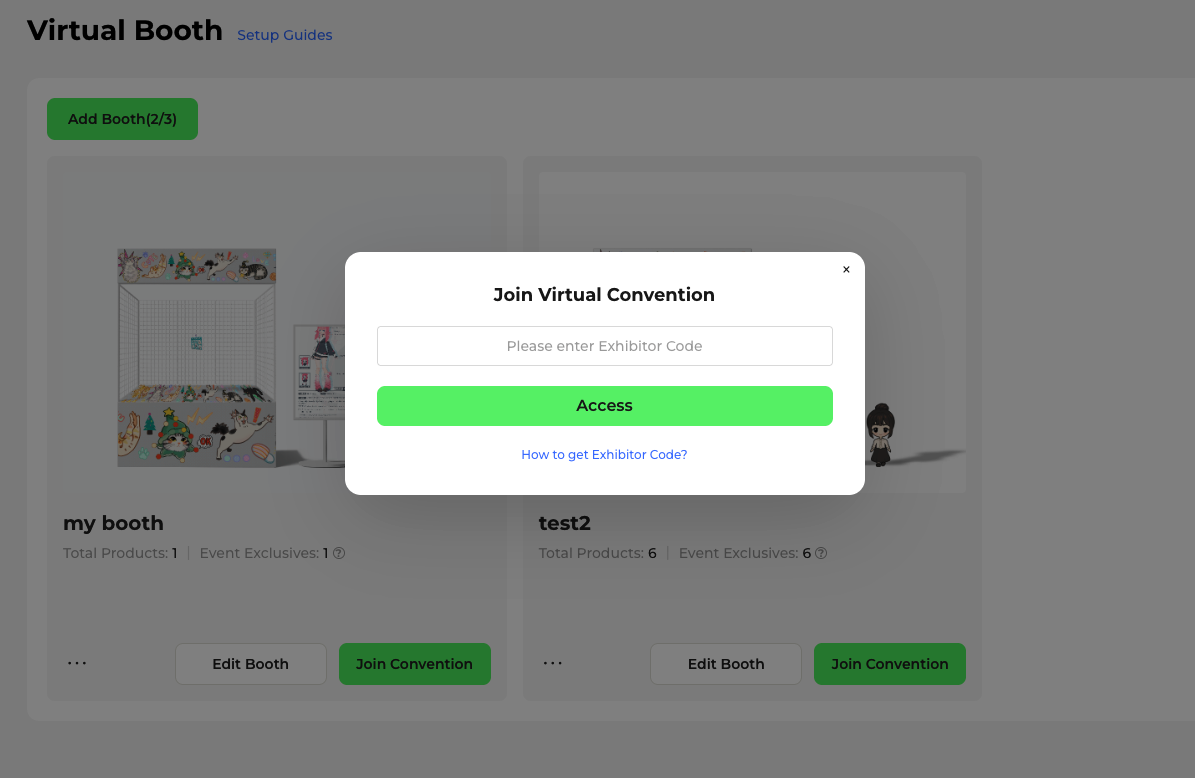
Each Exhibitor Code is tied to a specific Booth ID, meaning your booth’s location on the map is pre-assigned by the organizer. If you want a specific location, you must request it directly from the organizer before they generate your code.
Once you have your code, simply click “Place your booth here” and congratulations, your booth is officially set up at the event!
Before starting setup your booth, please check the convention’s schedule and Exhibition Rules to ensure you meet their setup and approval deadlines!
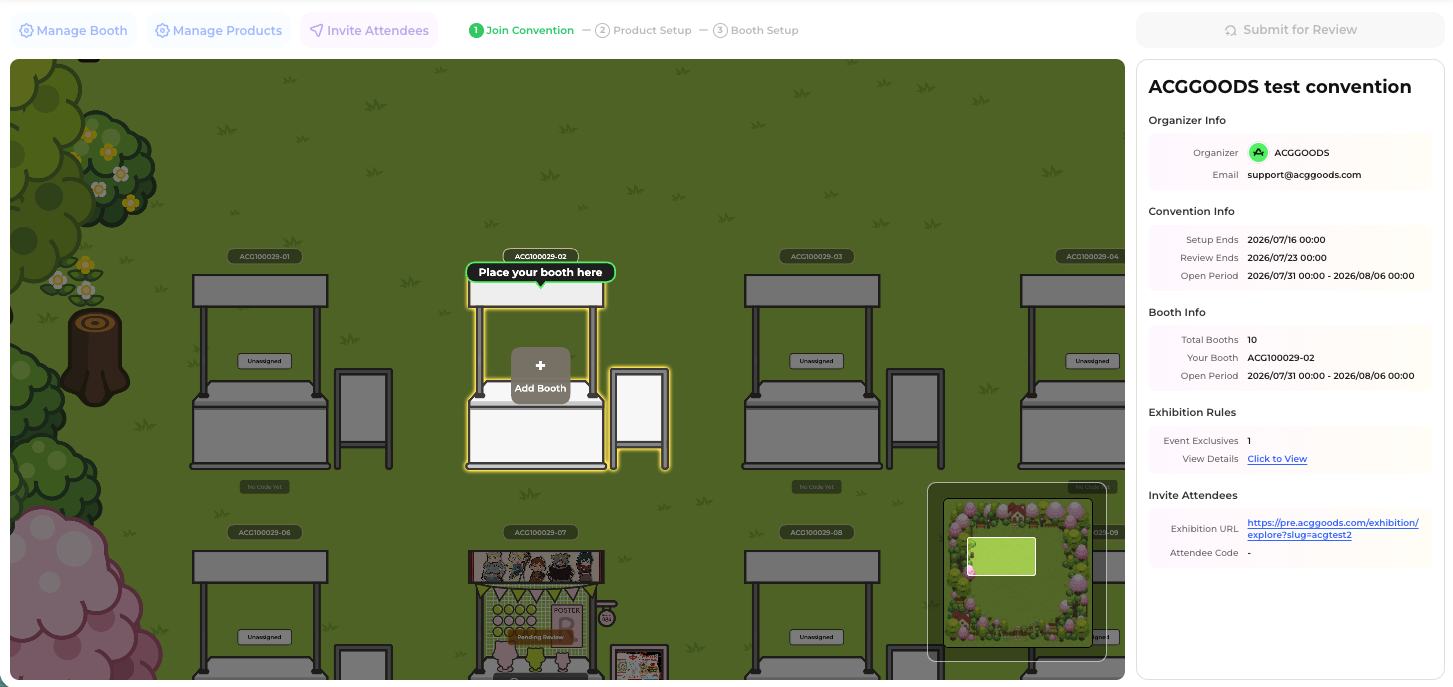
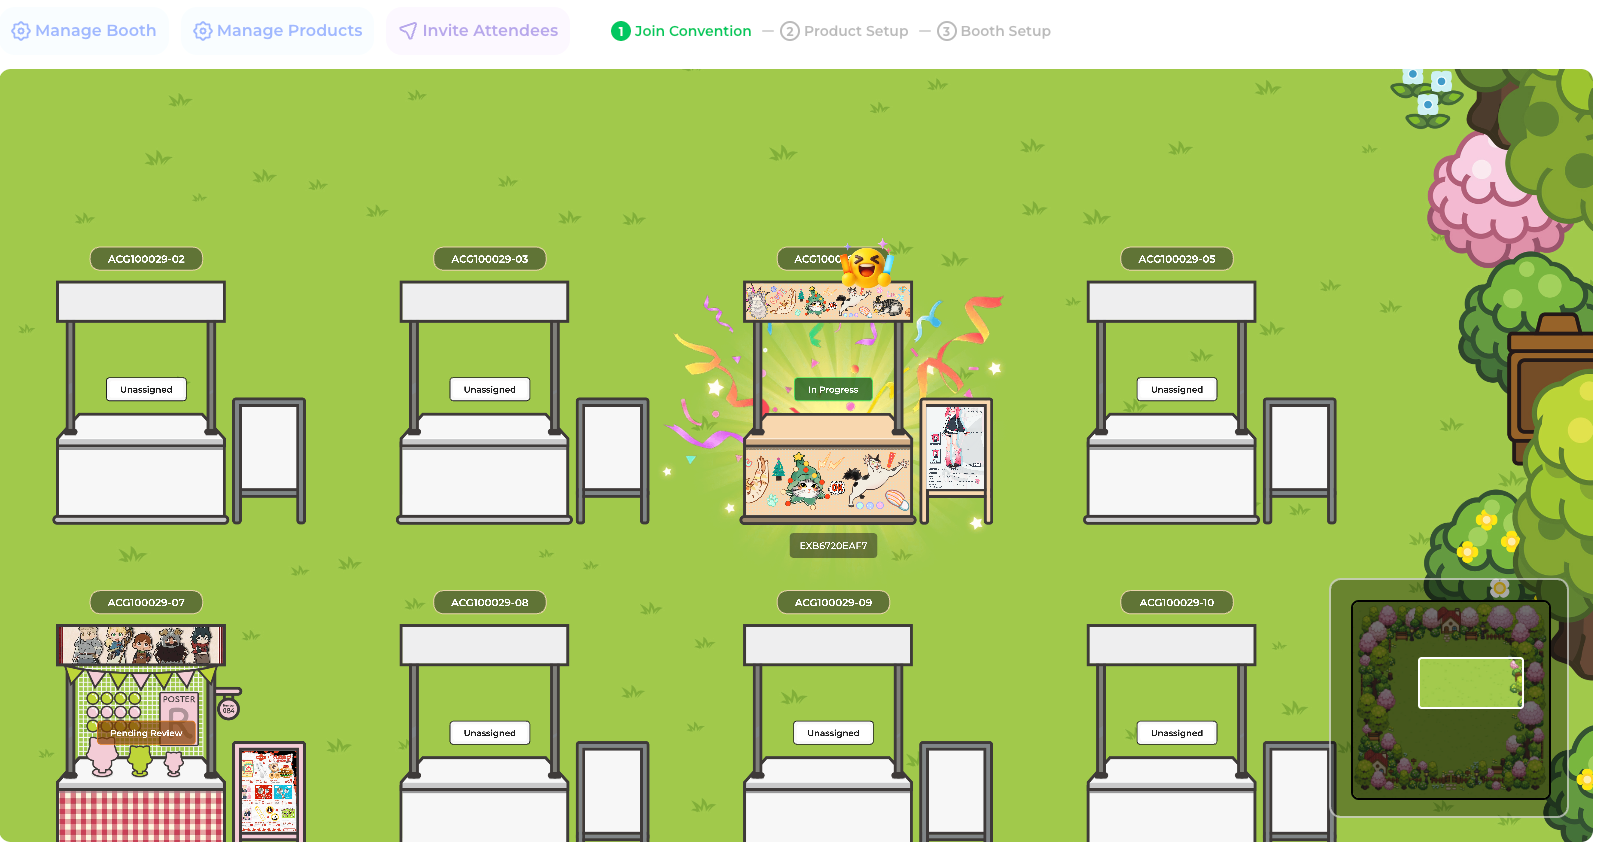
Once placed in the convention, you can manage your booth with the following settings:
1. Managing Your Convention Booth
Welcome Message: Set a custom greeting that visitors will automatically see when they stop by your booth.
Tip Support: You can toggle on “Tip Support” to allow fans to send you monetary tips directly. The platform charges zero service fees for these tips (however, standard transaction fees from PayPal or Stripe will still apply).
Booth Visibility: You can set your entire booth to public or private access.
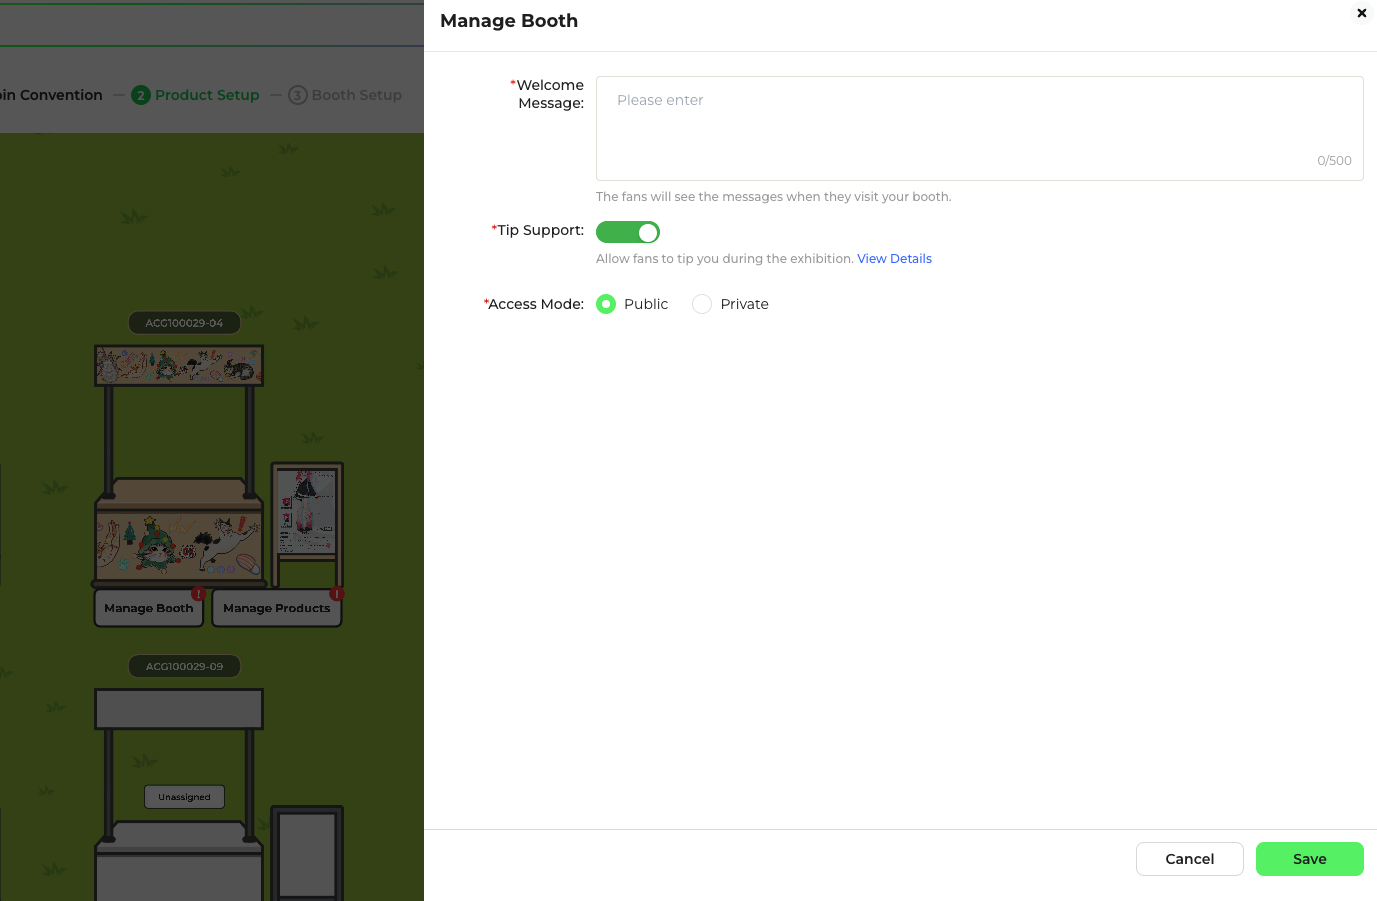
2. Manage Products
Inventory Management: Because virtual conventions are time-limited events, you must allocate specific stock quantities for each product you display.
Product Visibility: Just like your booth, individual products can be set to public or private access mode.
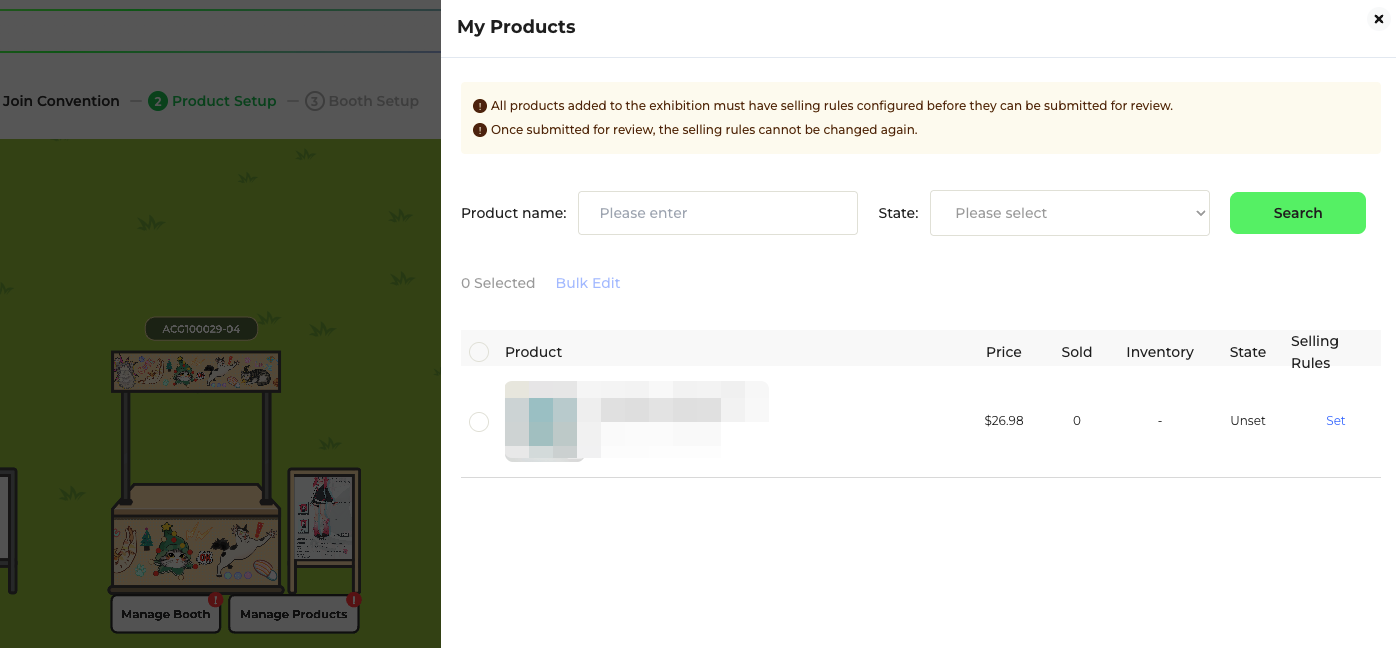
Step 4: Submit for Review
After finalizing your booth settings, click submit and notify the event organizer to review your application.
Important: Always check the convention’s schedule and Exhibition Rules to ensure you meet their setup and approval deadlines!